Deploying an Application as an Azure Container App
Deploying an application as an Azure Container App involves several key steps, including setting up the environment, configuring the container, and scaling options. Follow the steps below to complete the deployment process.
Step 1: Create a Resource Group
Start by creating a new Resource Group in your Azure subscription. This will act as a logical container to group all related resources for your container app.
Step 2: Create a Container App Environment
Next, create a Container App Environment. This provides the networking and compute context in which your container app will run. It's a prerequisite for deploying container apps.
Step 3: Deploy the Azure Container App
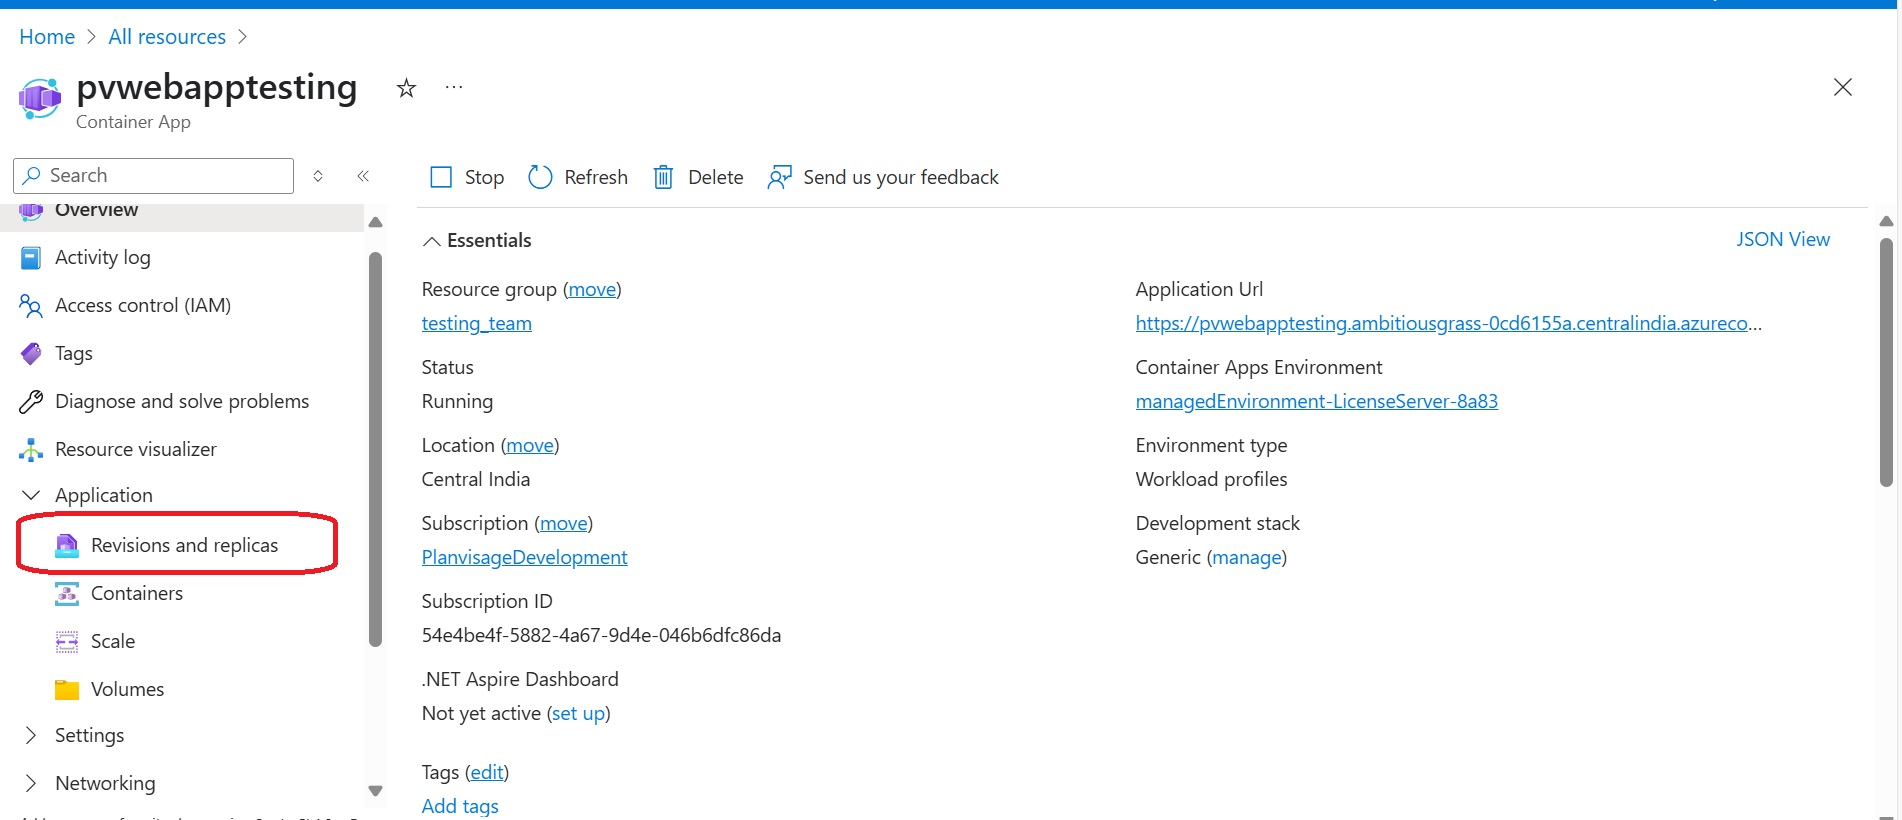
- Select the Resource - Container App where you want to deploy your new container image.
- Navigate to the Application menu and click on Revisions and Replicas.
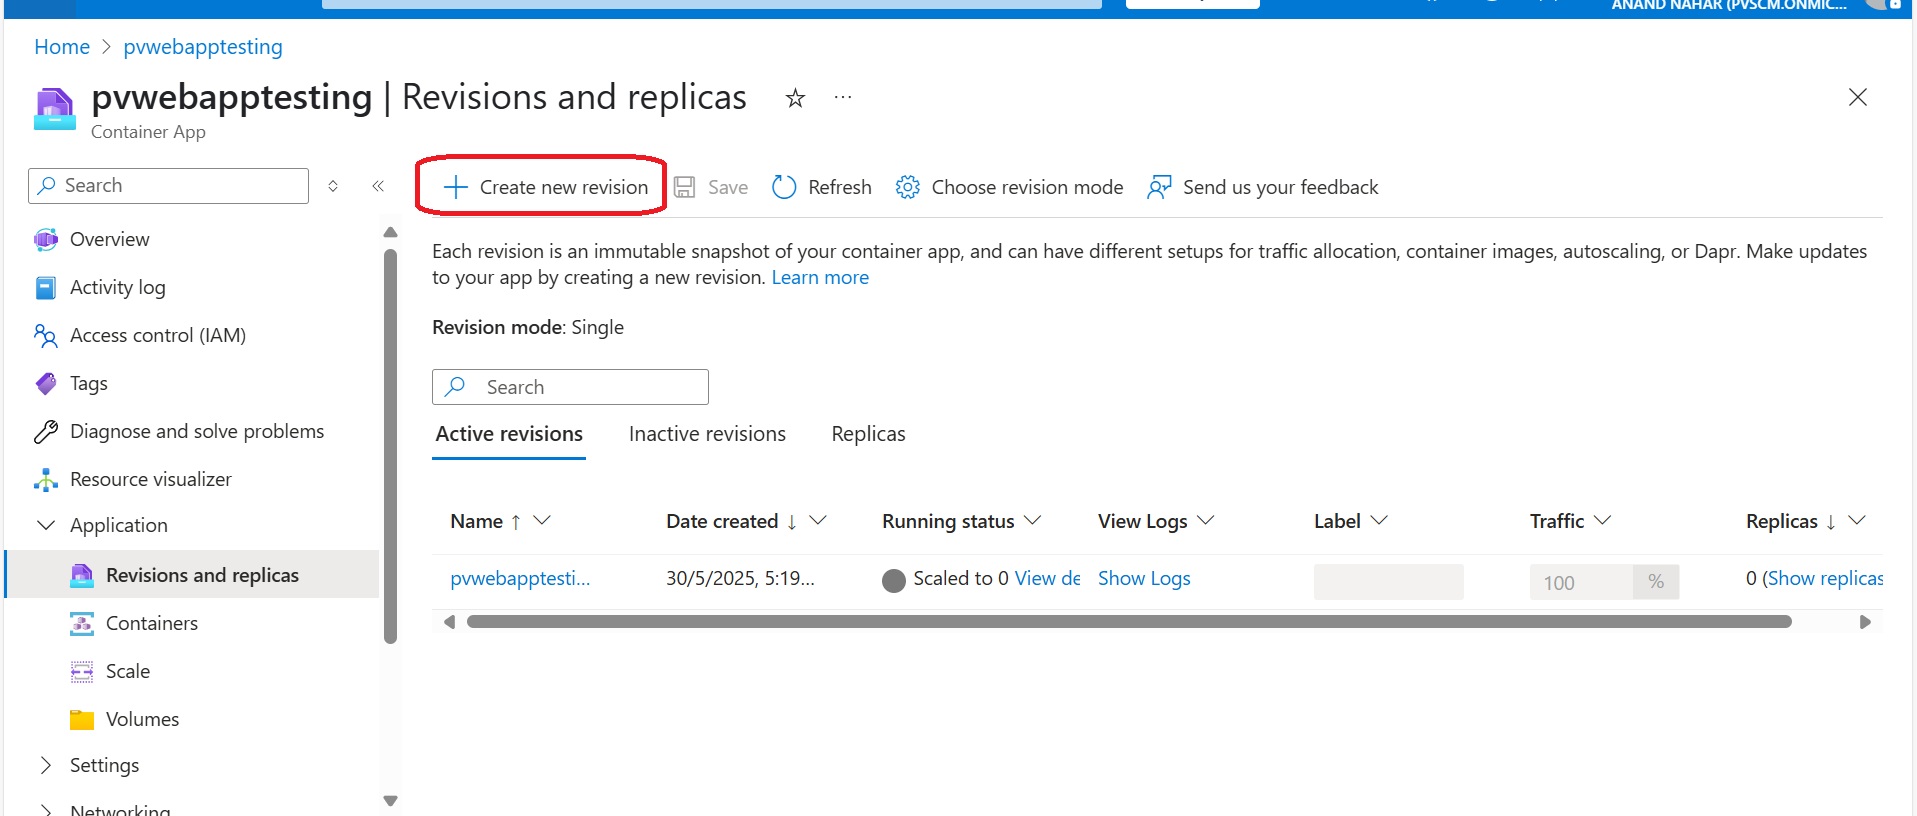
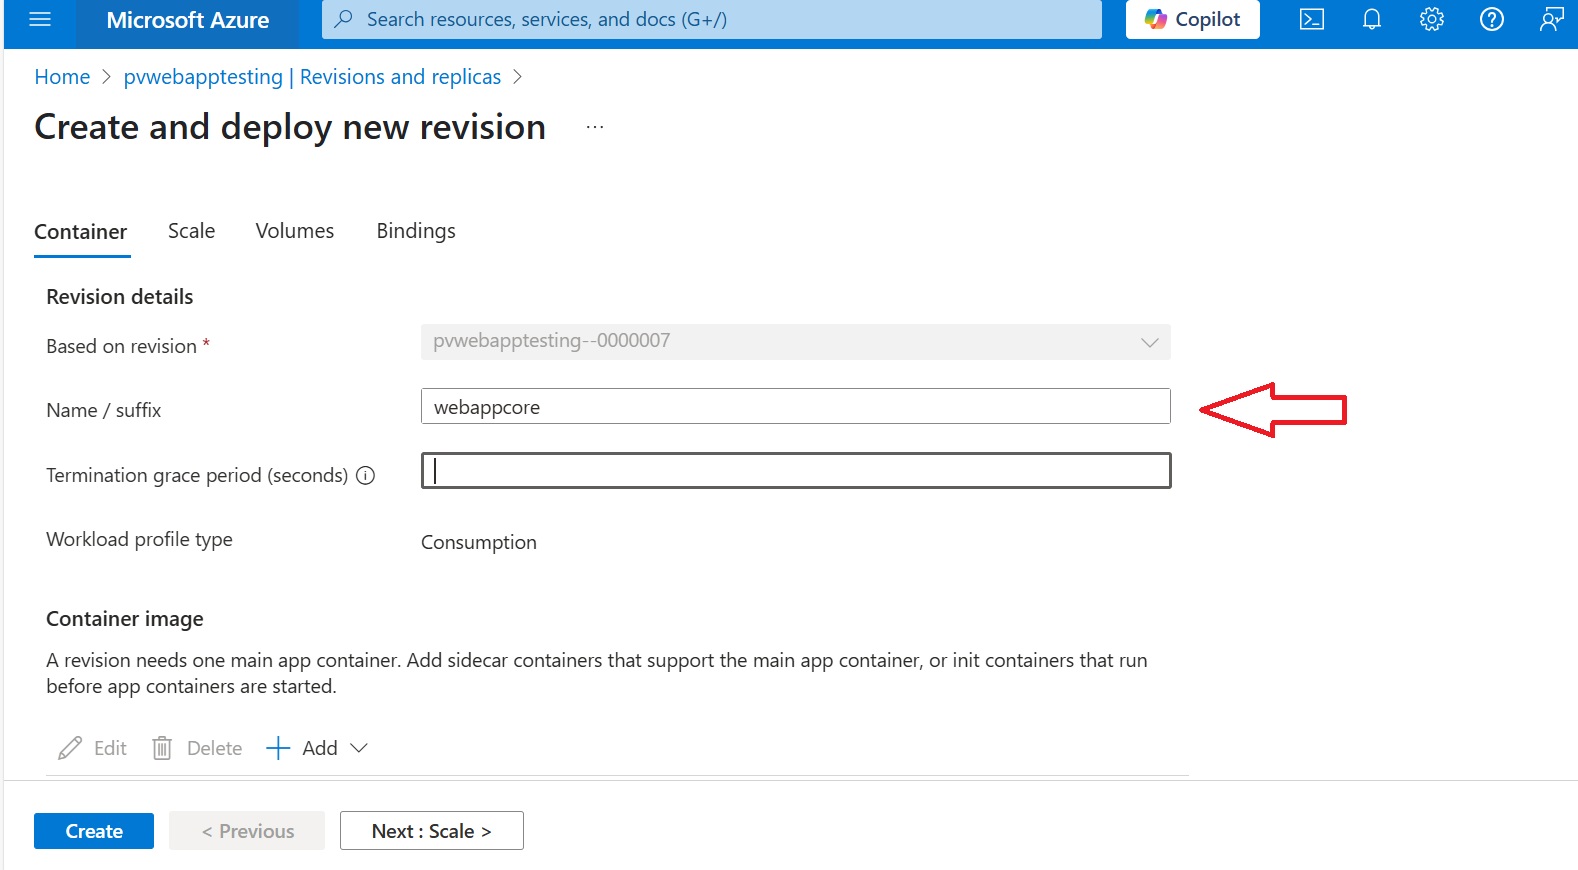
- Click on the Create New Revision option. Enter a name or suffix (in lowercase), then click the Scale button.
Configure the Scale Rule Settings
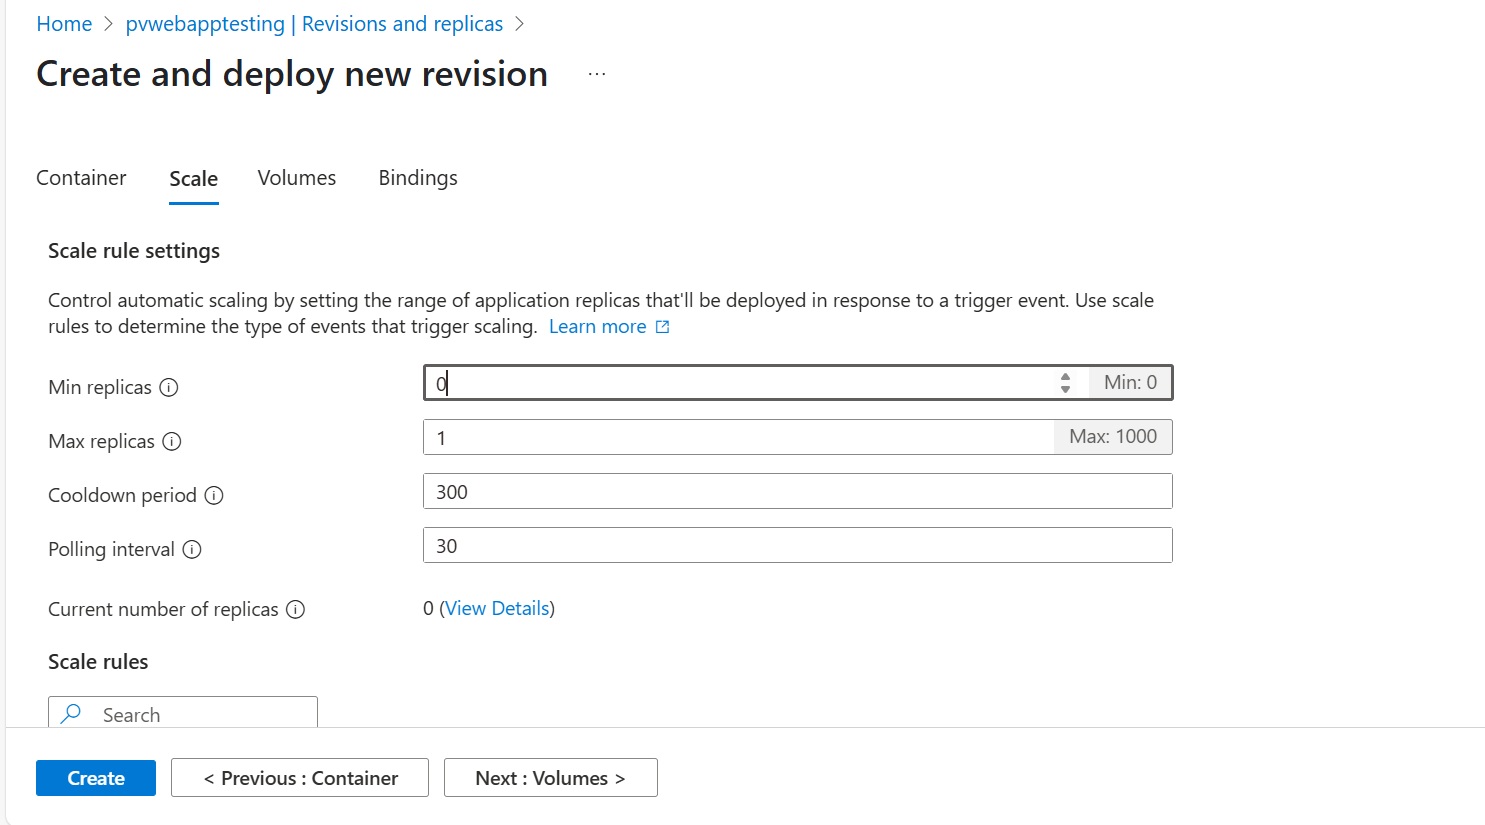
You can configure how your container app scales based on usage:
- Min Scale (Minimum Replicas):
- Set to
0if you want the application to scale down to zero when not in use. This will stop the container to save costs. The app will cold-start when a new request arrives. -
Set to
1if you always want one instance running to avoid cold starts and ensure faster response times. -
Max Scale (Maximum Replicas):
- Set to
1if you expect minimal concurrent usage. - Increase to
2or3if you anticipate more users accessing the app simultaneously.
Add the Container Image
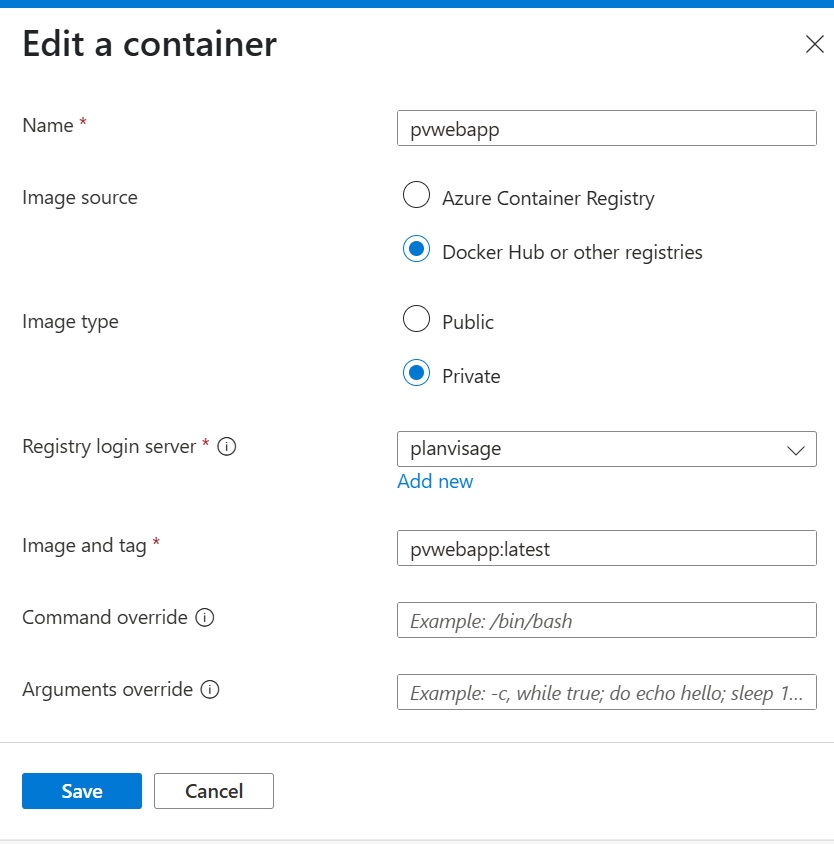
Click on 'Add' under Container Image to open the Add Container window.

- Enter the container image details (such as image name and tag) to pull the latest version.
- Click 'Add' to proceed.
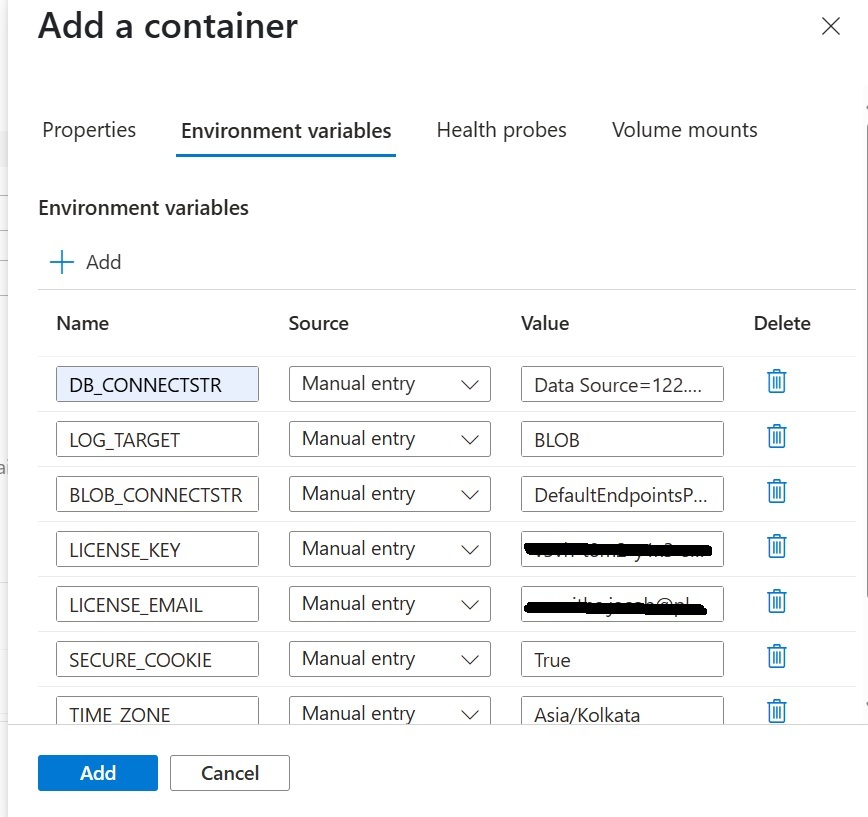
Configure Environment Variables
If the container app requires environment variables (for configurations, secrets, etc.), specify them in this step.
A list of possible environment variables required to configure the application is provided. Please refer to the document for details.
Verify Image Details
Click on the image name to view additional details such as the container image URL.
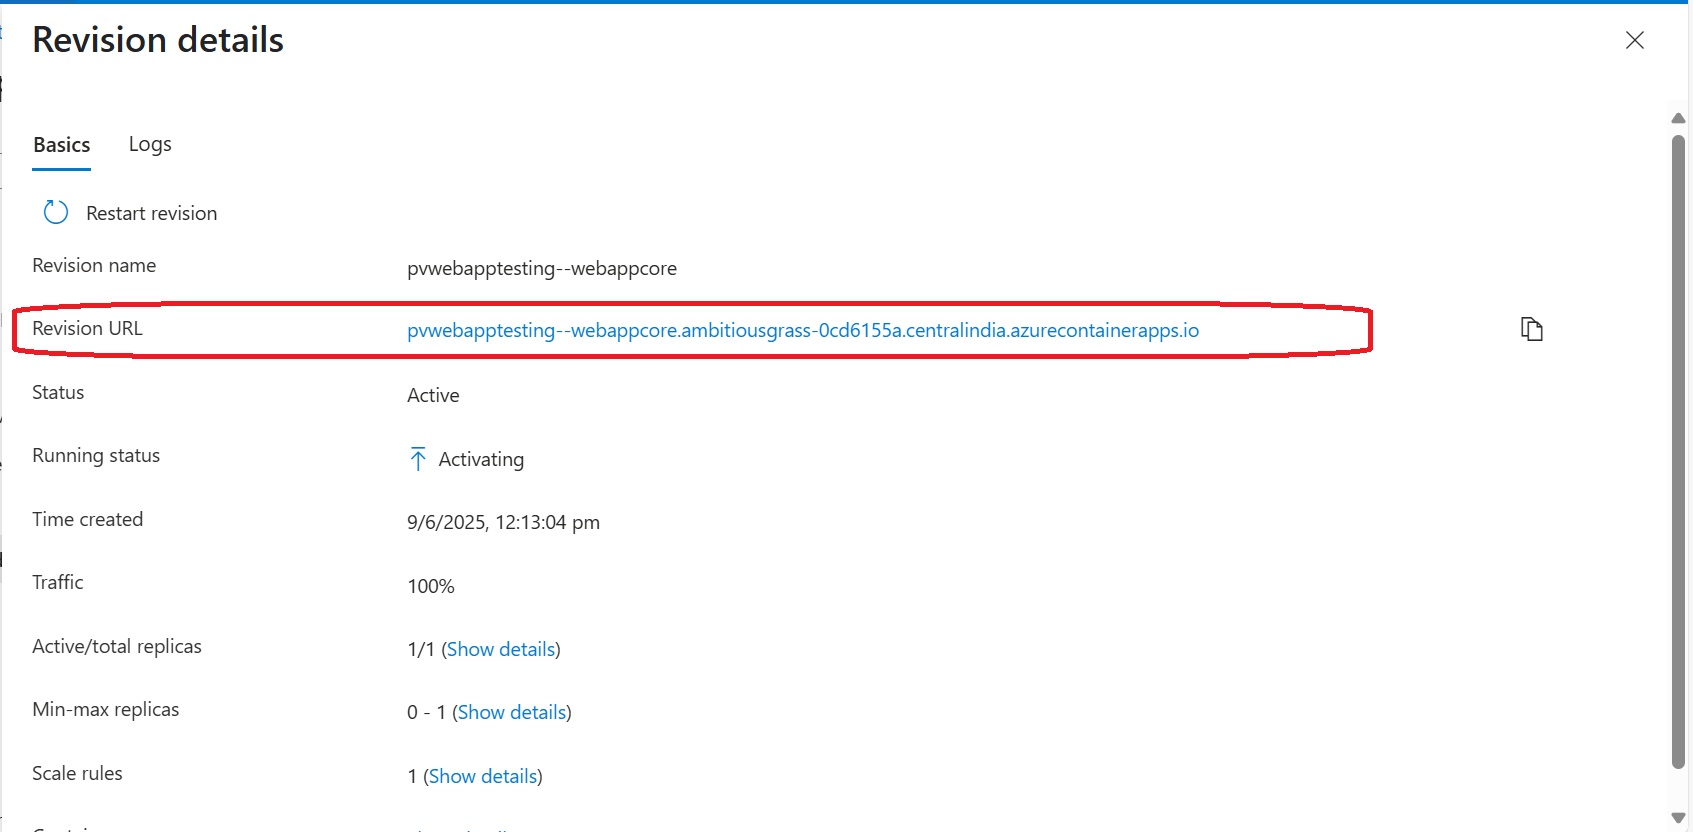
Step 4: Access the App
Once the container app is deployed successfully, you can access it via the URL provided in the Overview or Revisions section of the Container App page. You can test the app and ensure it's running as expected.
How to create container app job
Step 1: Open Azure Portal - Go to Azure Portal → Go to the Container Apps Environment → click on Create Container Apps Job.
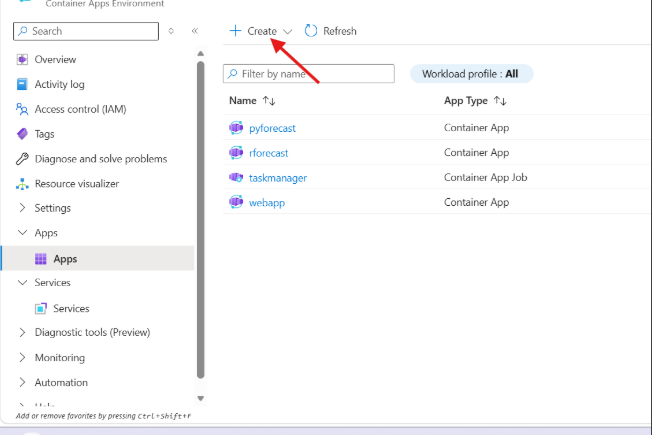
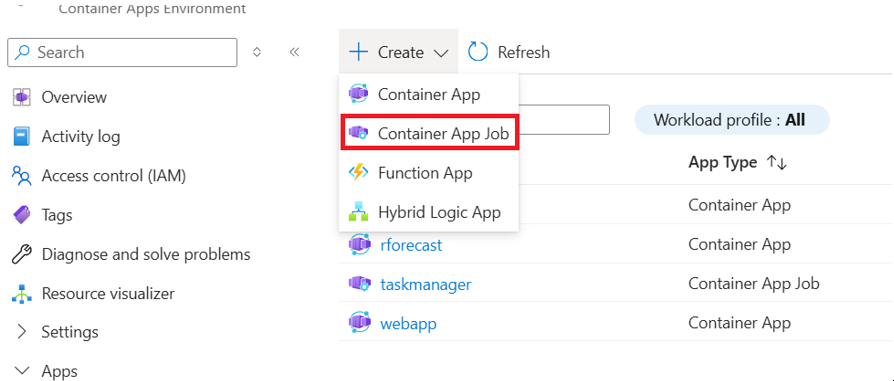
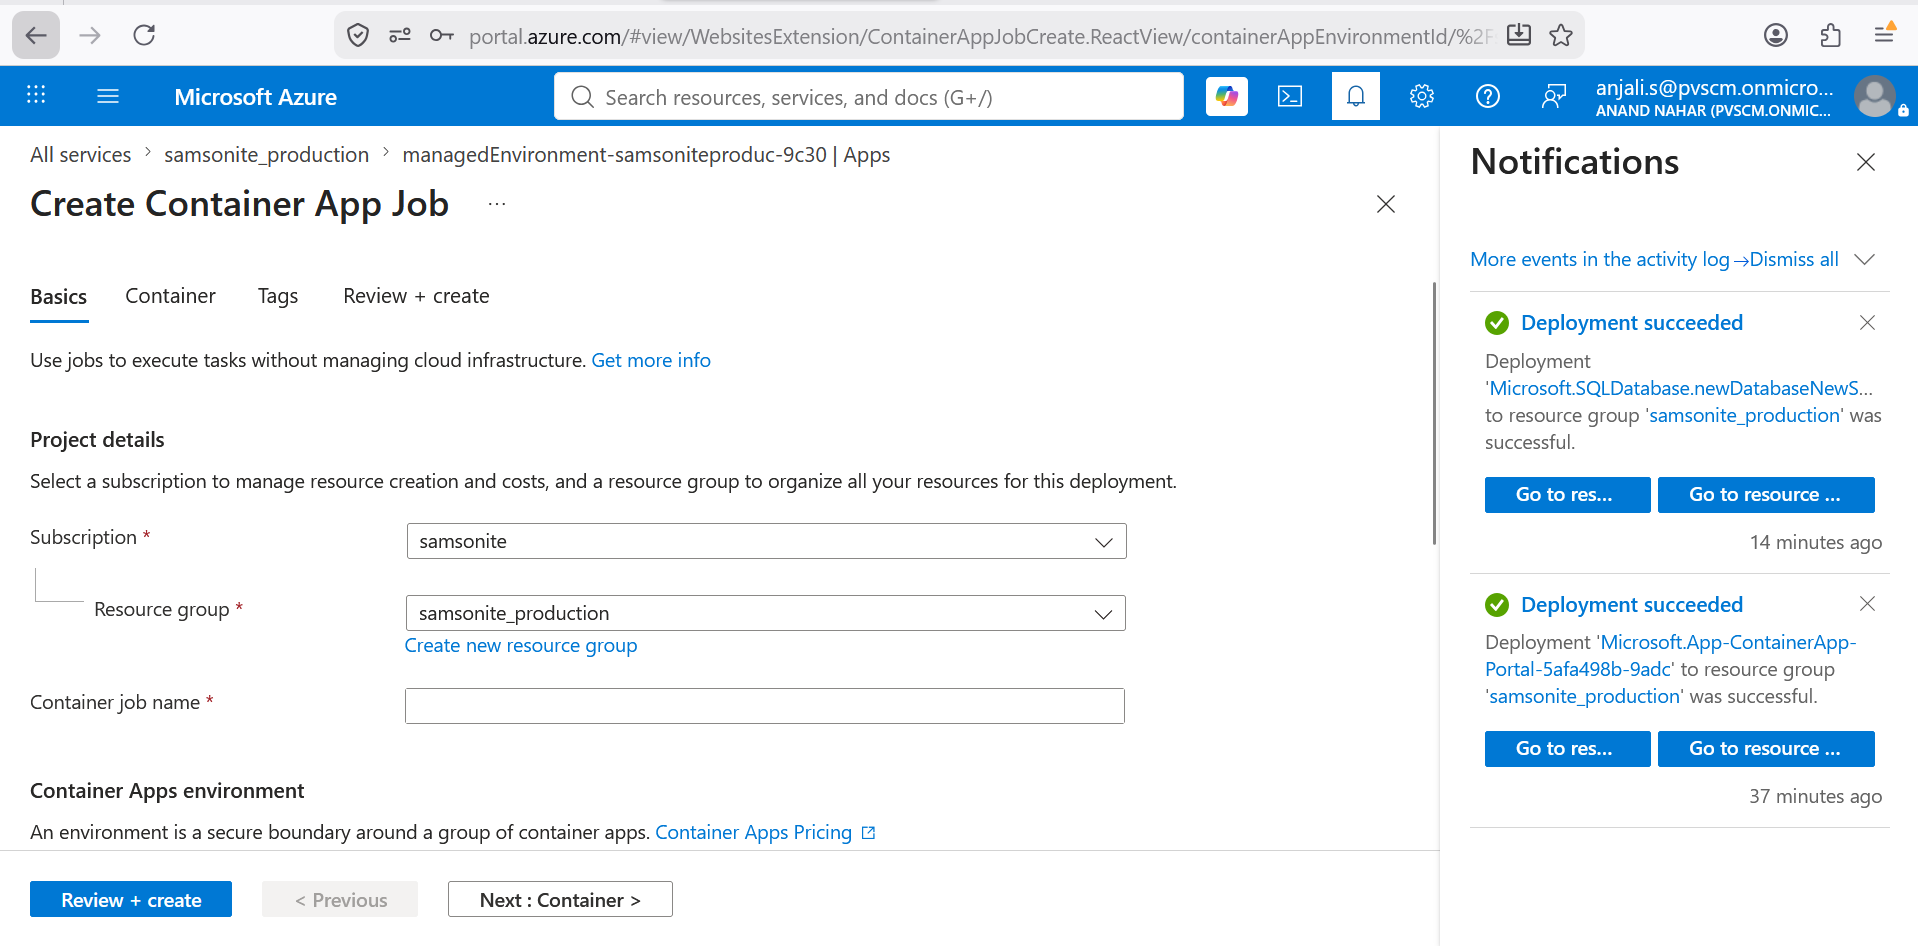
- Give the Container App Job name and image details and required environment variables
- Select Event-driven scaling from the left panel menu
- Add Scale Rules and Save the scale rule after providing the required details.
Add Scale Rule
-
After selecting Event-driven scaling from the left-side panel, click Add scale rule.
-
The Add scale rule window is displayed. Under Scale rule details, provide the following:
-
Rule name: Enter a unique name for the scale rule.
-
Custom rule type: Enter the custom scaler type if you are creating a custom scaling rule.
-
The window provides a Blank form option and several predefined scale rule options.
Blank Form
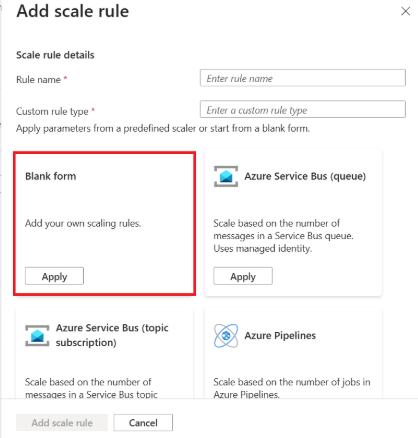
-
Select Blank form to create and configure a custom scale rule manually.
-
Click Apply under Blank form.
The blank scale rule configuration form will be displayed. - Enter the required scaling parameters based on the event source or trigger. - Review the configured parameters. - Click Add scale rule to save the scale rule. - Predefined Scale Rules
You can also select a predefined scale rule based on your requirement. For example:
- Azure Service Bus (queue): Scales the Job based on the number of messages in an Azure Service Bus queue.
- Azure Service Bus (topic subscription): Scales the Job based on messages in a Service Bus topic subscription.
- Azure Pipelines: Scales the Job based on the number of jobs in Azure Pipelines.
Select the appropriate option, click Apply, provide the required configuration details, and save the scale rule.
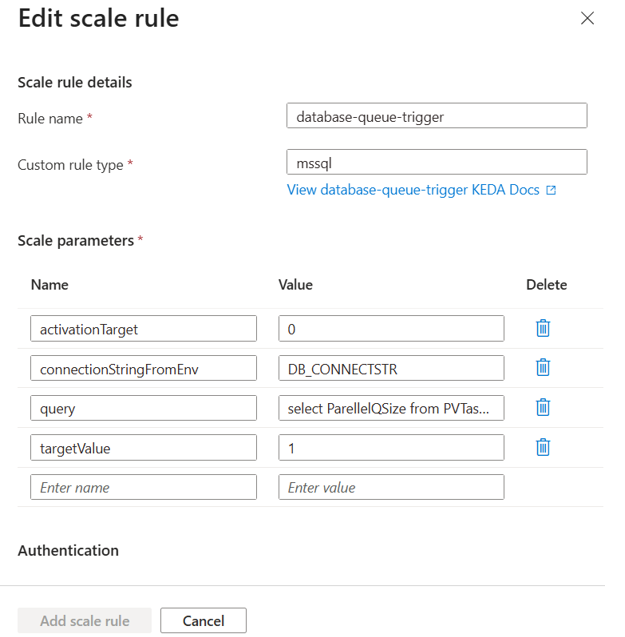
Also, add the required Connection String as an environment variable under the Environment Variables section.
- Provide the required Connection String Name.
- Enter the corresponding Connection String Value.
- Verify that the connection string is correctly configured.
- Click Save to save the configuration.
Configure Job Settings
- Select Job configuration from the left panel.
- Configure the required Replica completion count.
- Configure the required Parallelism.
- Set the required Replica retry limit.
- Configure the required Timeout value.
Review and Create the Container Apps Job
- Review all the configured details.
- Verify the Container App Job name, Container Image, Environment Variables, Connection String, and Scale Rules.
- Click Create to create the Container Apps Job.
Verify the Container Apps Job
After the Job is created:
- Open the created Container Apps Job.
- Navigate to the Overview section.
- Verify that the Job has been created successfully.
- Check the Executions section to monitor the Job execution status.
- Open the execution details and check the Logs to verify that the container is running successfully.
The Job execution status should be Succeeded after the task is completed successfully.